More pumpkin activities in preschool

PicMonkey Collage


As we continue to enjoy the Fall season, we have explored pumpkins in our classrooms in many ways!

We’ve opened them up, scooped them out, counted the seeds and made delicious pumpkin treats!

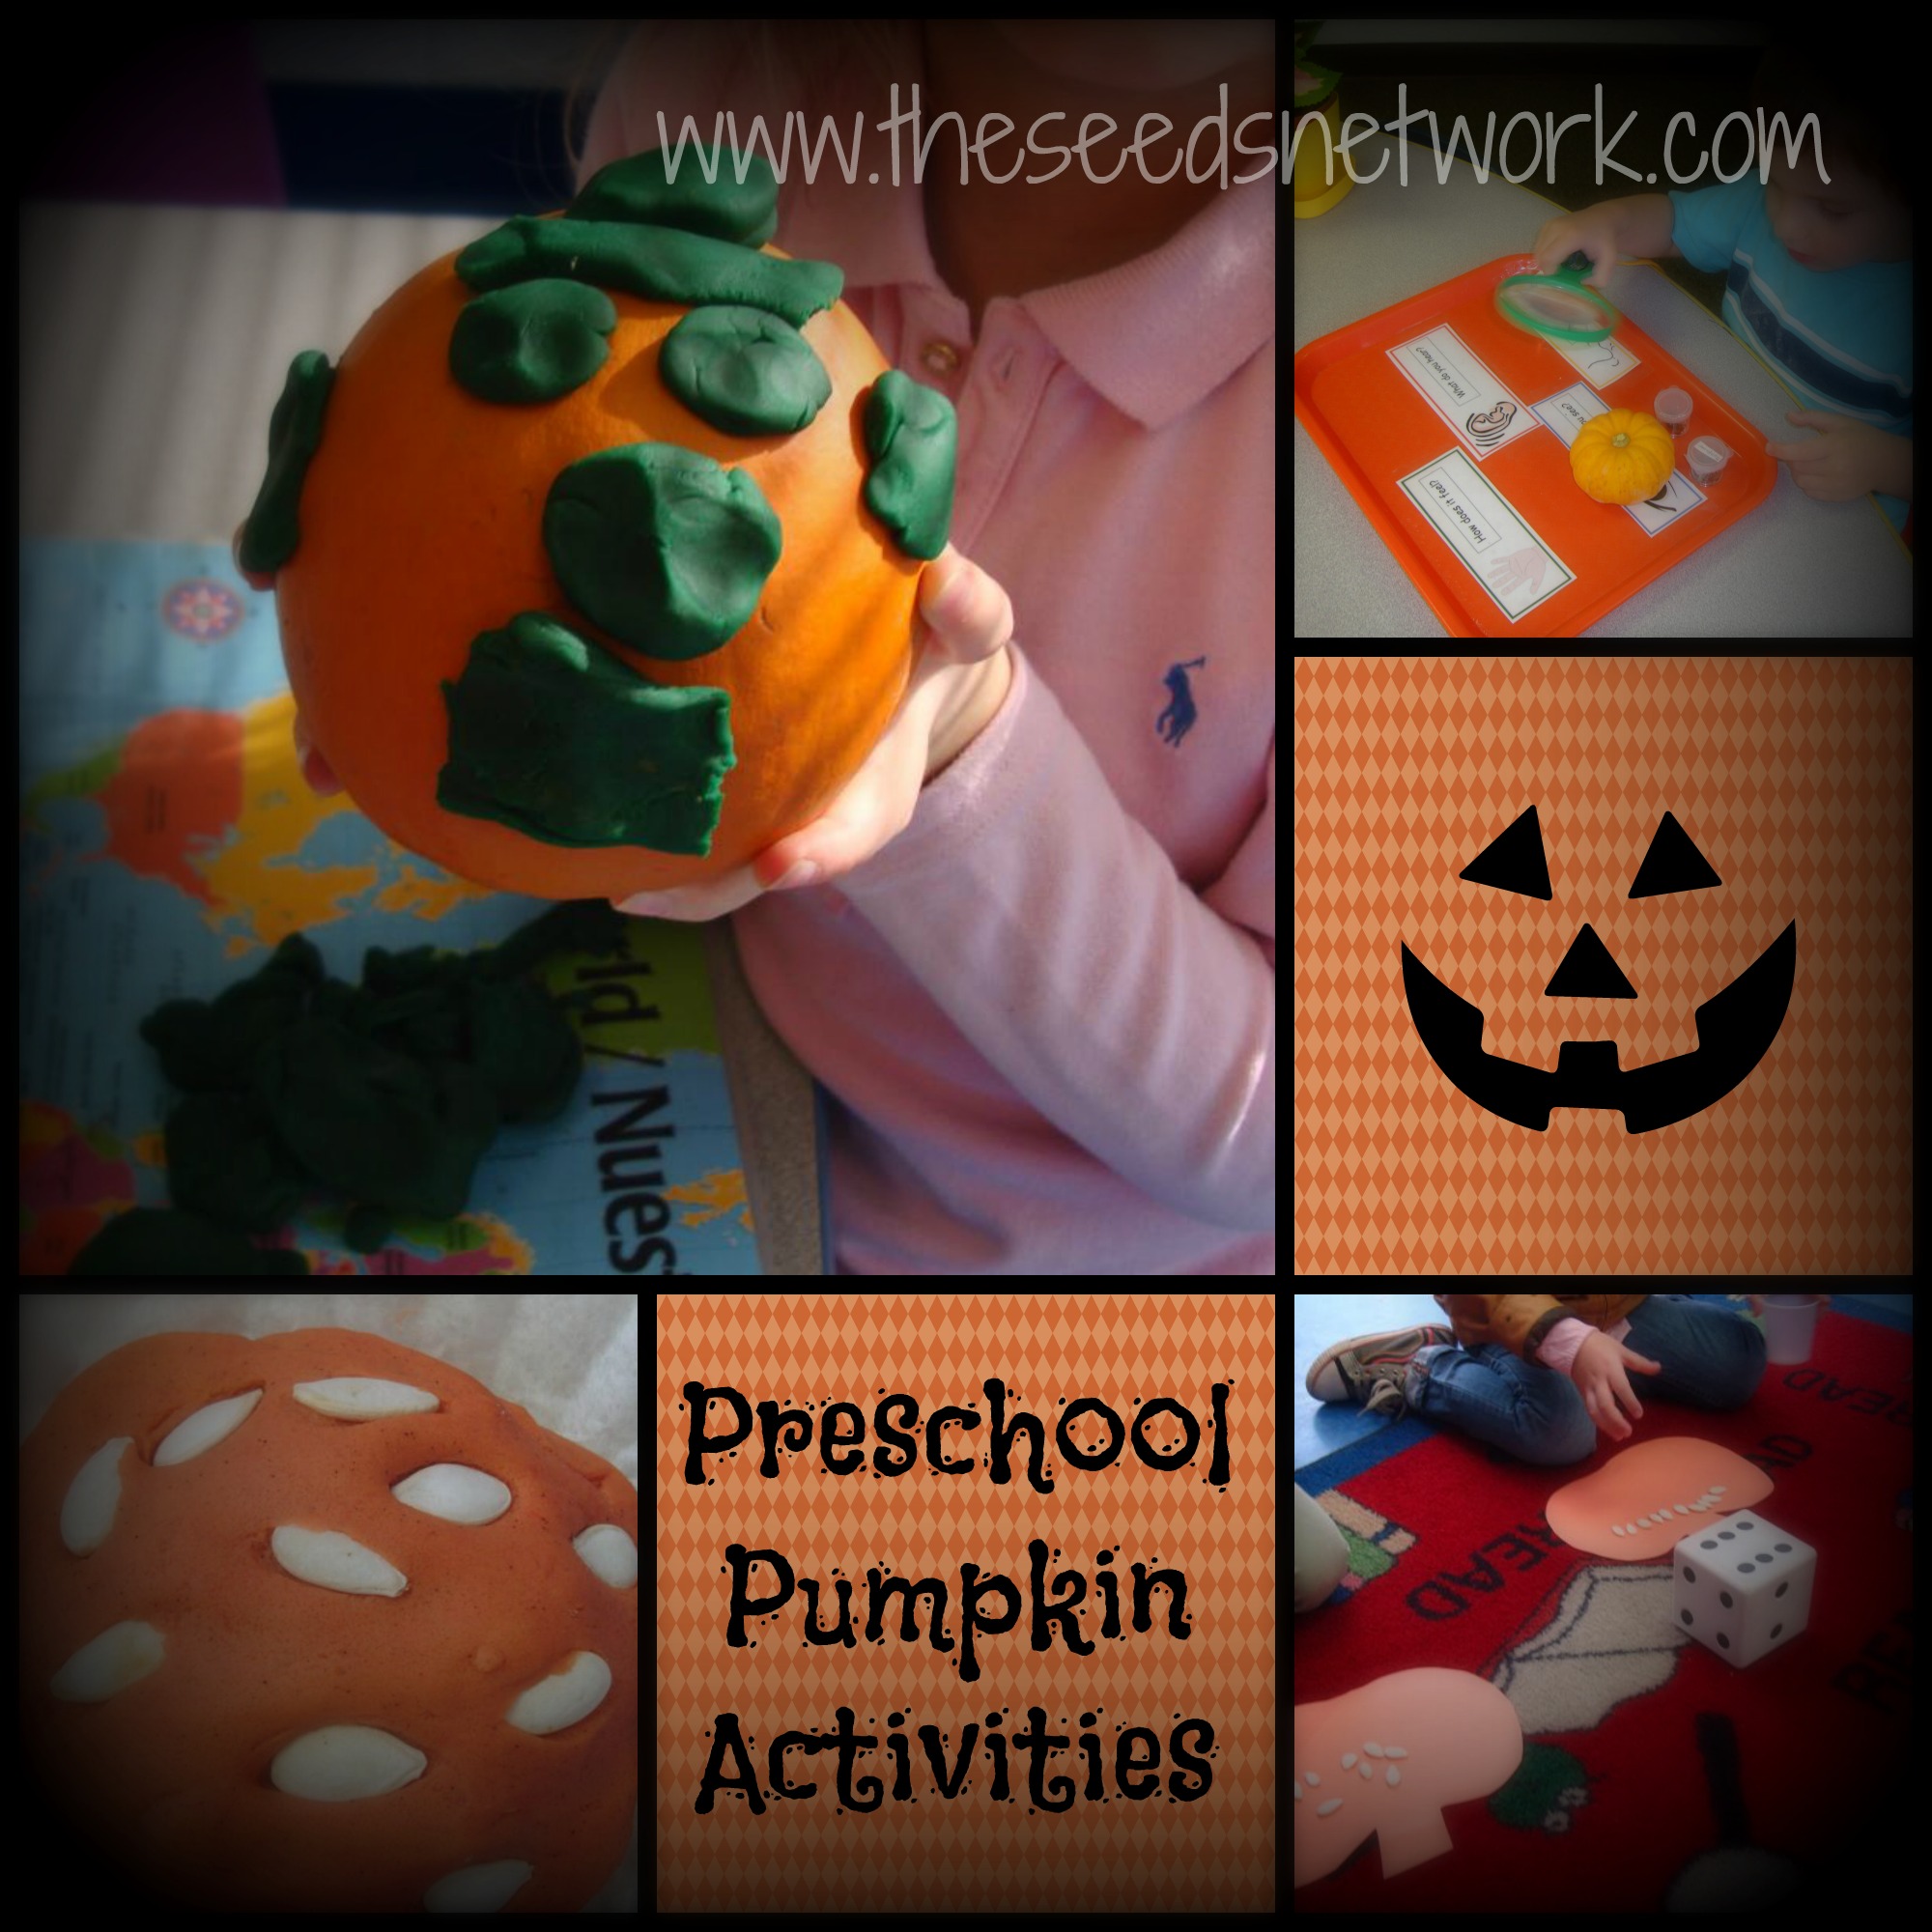
I talked about some ideas in the “Learning about apples and pumpkins” post … but here are a few other ideas for ways to play and learn with pumpkins in preschool!

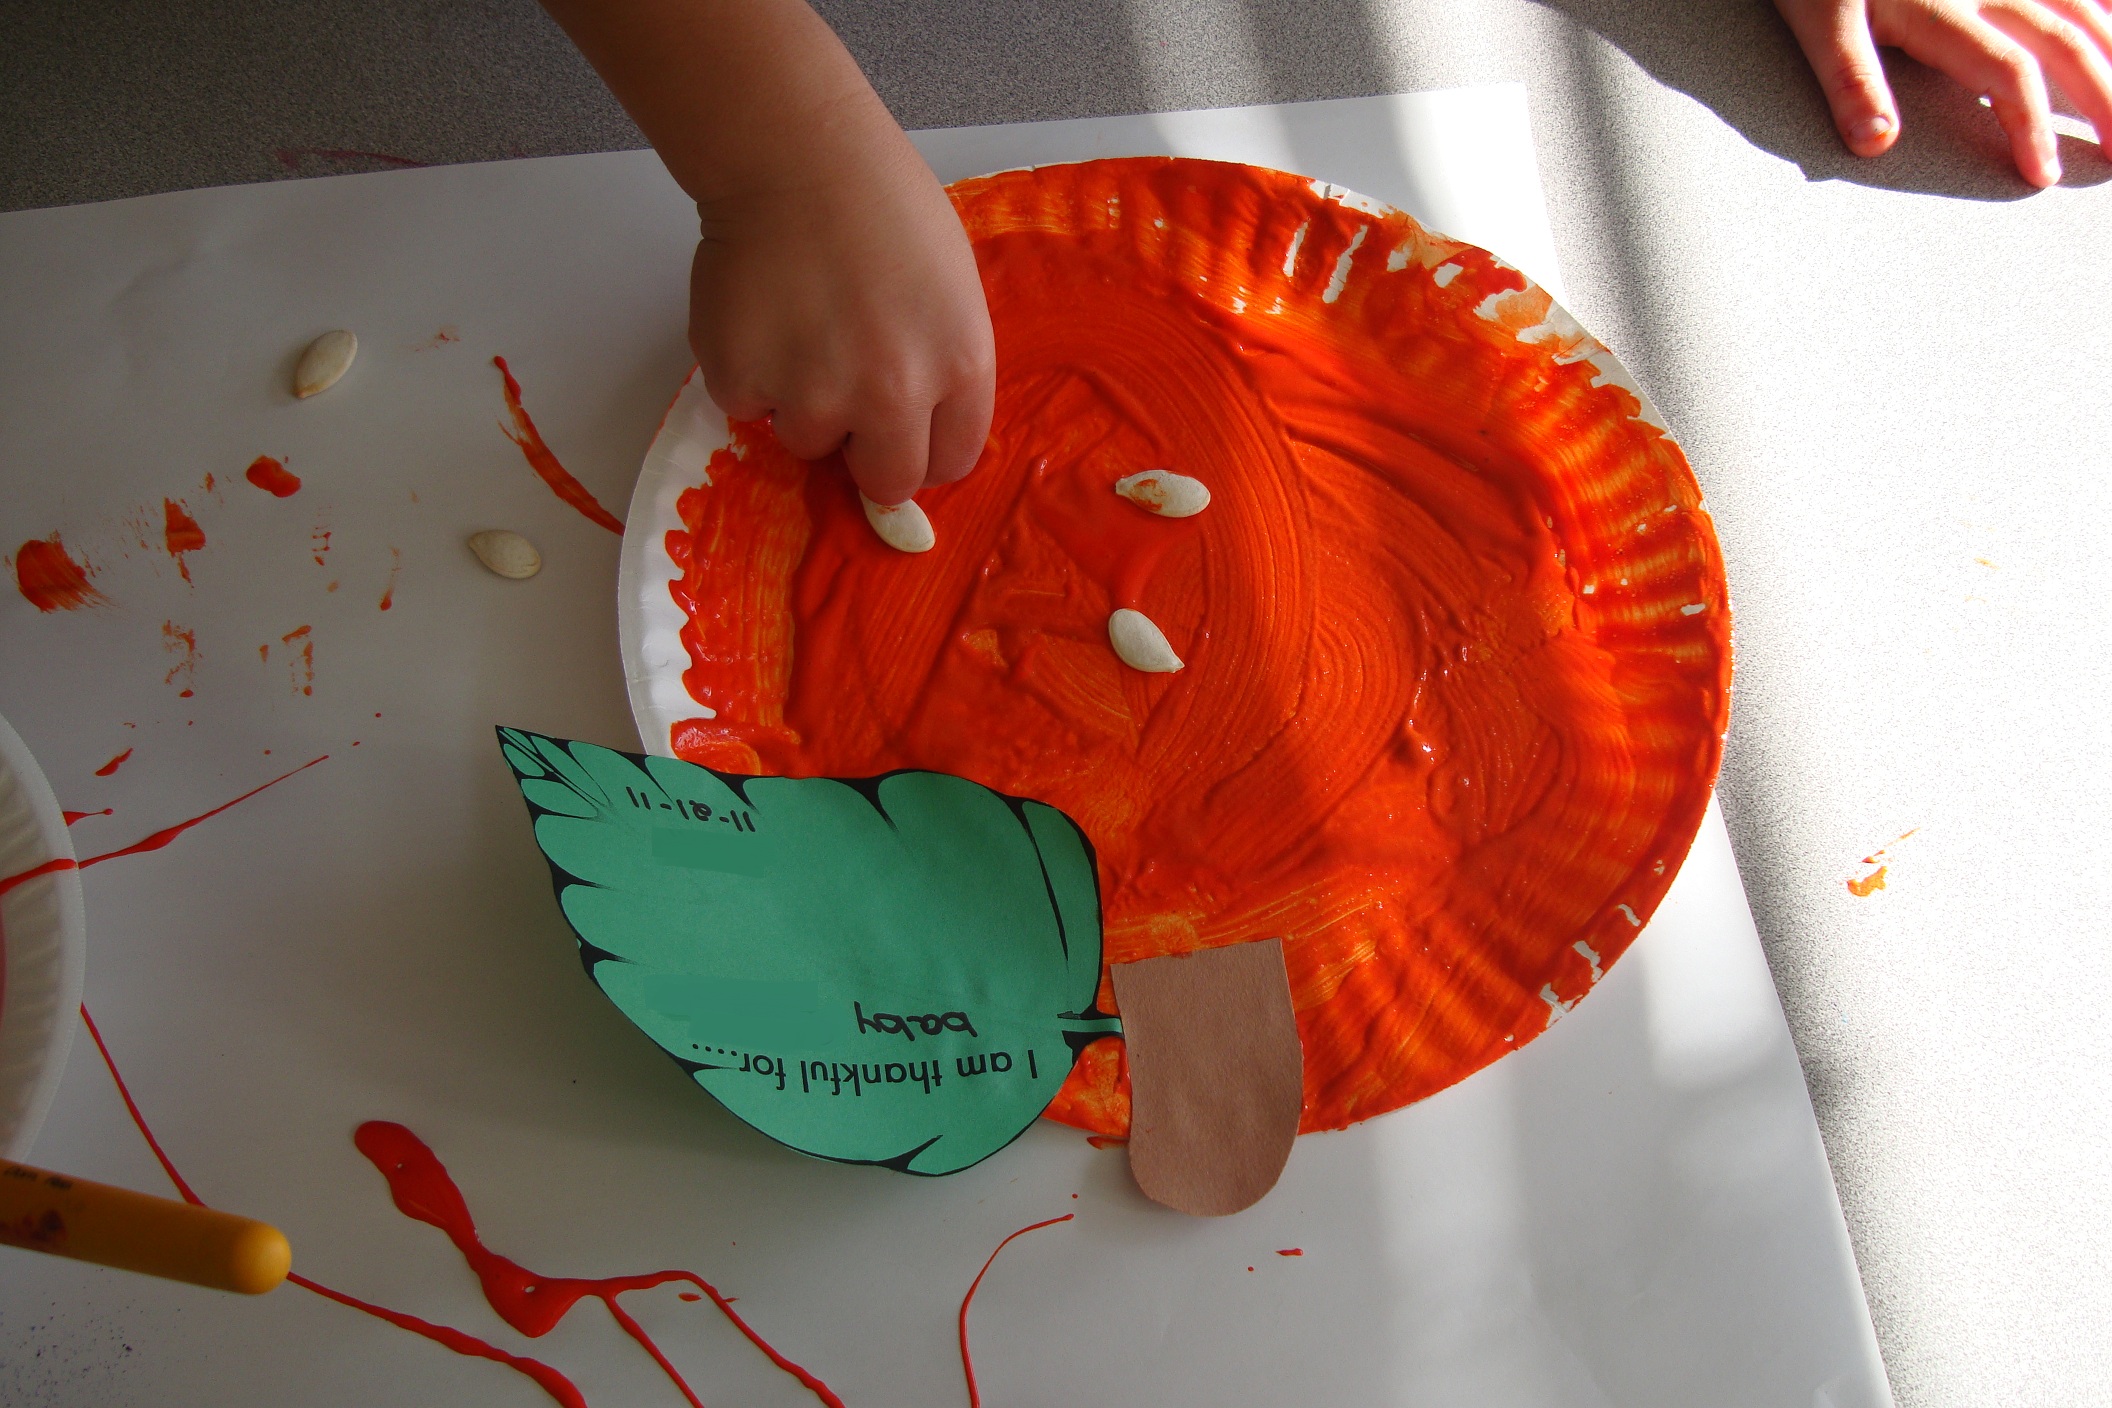
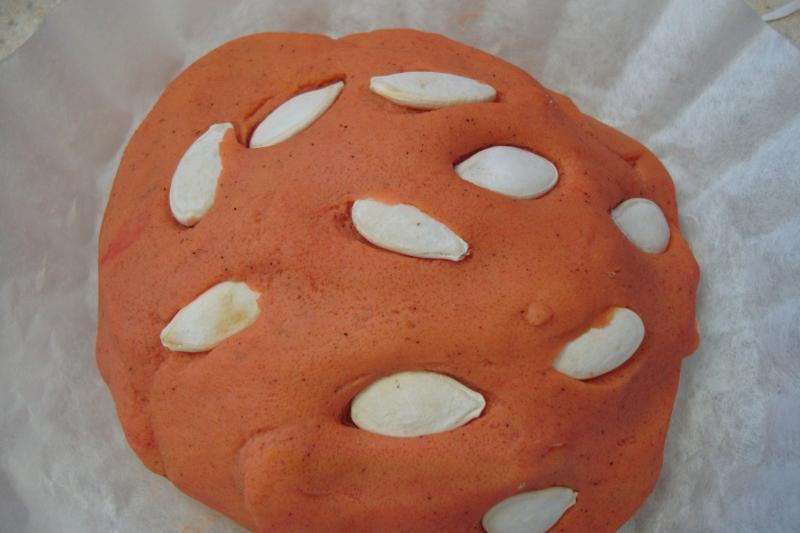
Pumpkin Playdough – We took a simple, no-cook playdough recipe, added red and yellow food coloring … and then added some cinnamon and pumpkin pie spice to the mixture! The children loved the smell! I asked them what they thought it smelled like … I got some really cute answers like “donuts” and “apple sauce”! Then we added some pumpkin seeds to the dough, for an extra sensory experience.

pumpkinplaydough

Pumpkin butter – Using heavy whipping cream, salt, canned pumpkin, powdered sugar and cinnamon (or pumpkin pie spice), the children can measure, mix and then SHAKE the ingredients to make a delicious pumpkin butter to spread on crackers or bread. Great science experiment to see how the liquid transforms to the creamy butter as they shake!

Pumpkin Pudding pies – Another yummy recipe featuring vanilla pudding and pumpkin pie filling!

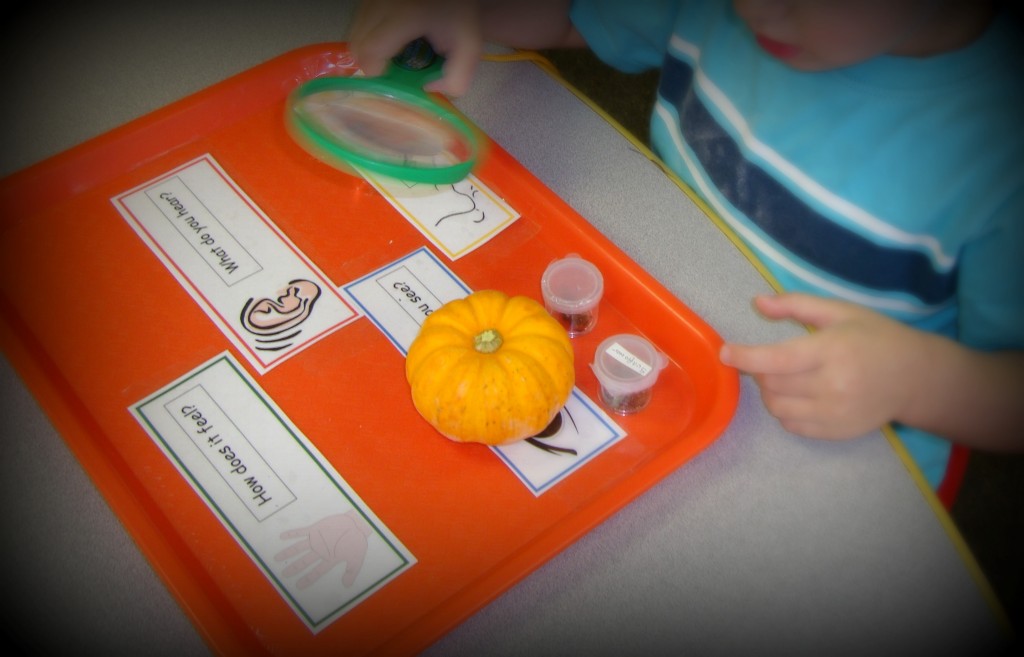
Using Our Senses Pumpkin Exploration – Allow children the opportunity for some individual exploration with a small pumpkin, pumpkin pie spice (in a container) and pumpkin seeds (in a container).  Children can explore what they see, feel, smell and hear!

pumpkinkid

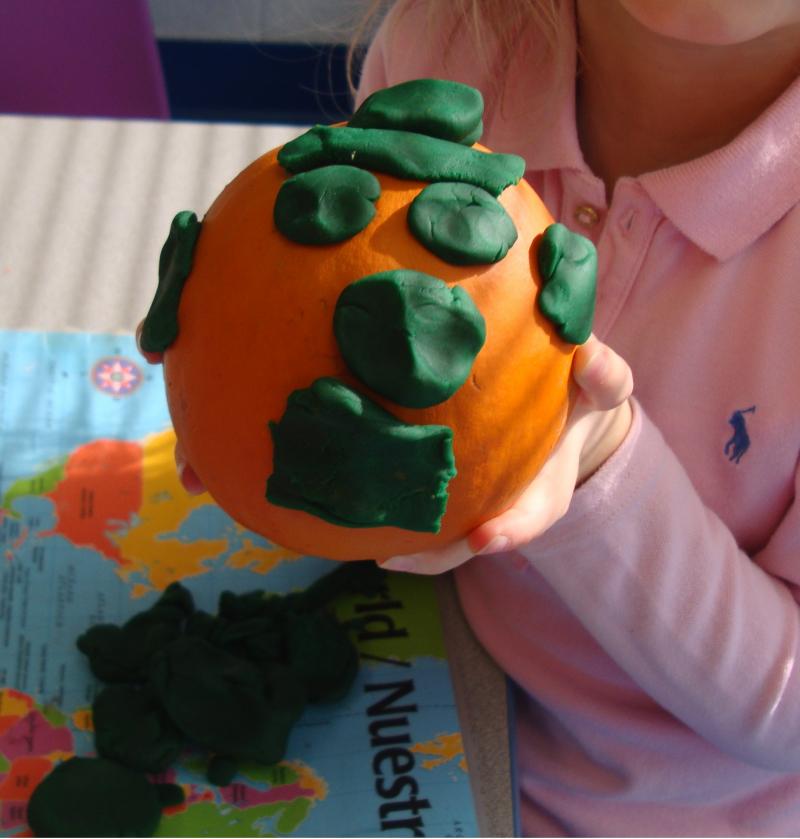
Pumpkin Playdough faces – We had fun with this great idea by Deborah at Teach Preschool where we made faces on real pumpkins simply using playdough!

pumpkinface

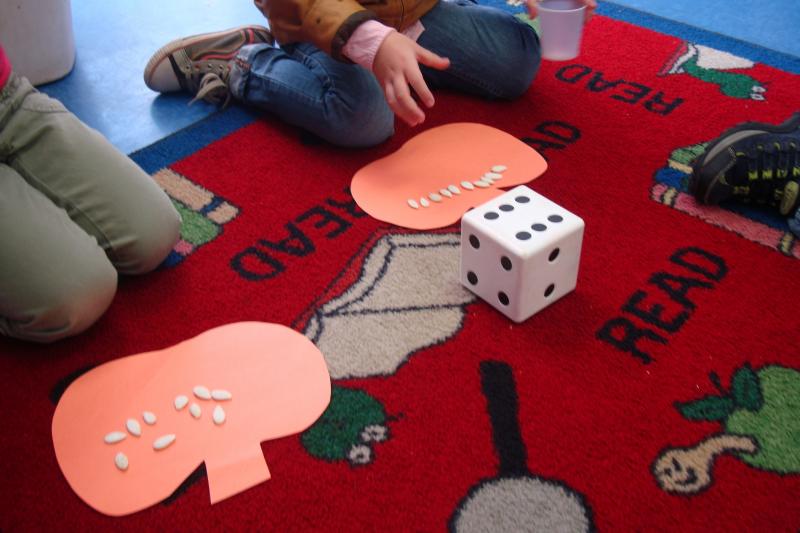
Count a seed pumpkin game – This is a fun, cooperative game that will help children practice counting (one-to-one correspondence).

pumpkingame2


Do you have any other fun pumpkin ideas to share?

Leave a comment or link below!

Our “Many Colored Days” ice cube painting

ice cube paintingA good story to read to preschoolers to discuss feelings is “My Many Colored Days” by Dr. Seuss. Each day is described as a particular color, with an animal that corresponds to that feeling.  The use of colors and animals helps to explain feelings in a way that children can start to understand.  For example, on a yellow day there are busy, buzzing bees – and children can pretend to buzz and flap their “wings” quickly to try and understand how it might feel to be a bee (i.e. a yellow day might be a busy day, or a day when you have a lot to do).

After reading the story, the children make a colorful group painting using colored ice cubes – which is simply food coloring and water, or liquid watercolor that is frozen. ** These would need to be prepared the day before – before cubes are fully frozen, stick craft sticks in each cube. **

Take a marker and put happy, sad, mad or excited faces on the ends of the craft sticks. Take out a sheet of large white easel paper and show children the colored “feeling” ice cubes.   Allow the children to experiment with using the cubes to paint onto the white paper.   Discuss some of the feelings from the story as they paint.  Ask them if they can identify the “feeling” that is represented on the cube stick they are painting with.  How does that color make them feel?.

Last minute Father’s Day gift

Father's Day Ok … it’s the day before Father’s Day … do you need a quick, simple yet personal gift idea that the children can make?? Don’t have time to run to the store?

Try personalizing a coffee mug!

Get a solid color ceramic mug and some Sharpie (or permanent) markers – you probably already have these items in your home. Have the child/children draw or write on the mug with the markers. If a mistake is made, a wet paper towel can help to rub it off if done quickly (we tried this … it works!)

Older children can write a special message, poem or words to describe their Dad, Grandfather or special recipient.

The Final Step

NOW, to make the permanent marker last — put it in a 350 degree oven for 30 minutes. Voila!!

Add a little something SWEET…

We had a Facebook comment suggesting that you could take this idea one step further and bake a CAKE in the mug as well! What a cool idea … and again, the ingredients are probably already sitting in your pantry! I did a Google search and found a link for “How to Make Cake in a Mug“. Yum! Enjoy!

Happy Father’s Day!!

Easter pop-up cross art

easterPopUpCross

Celebrate the true meaning of Easter by making this 3-D craft, showing the cross of Christ on a grassy hill.

Beforehand, fold a paper plate in half and then cut along the inside circle only half way.

easter2

Unfold the plate, and then you can lift up the cut-out notch and fold it up to look like a hill.

easter3

Have children cut up small squares of green paper (or cut them beforehand, for younger children).  Also cut two strips of brown paper to make the cross.

Children can color the “hill” with a green marker, crayon or paint and then glue green “grassy” pieces at the base of the hill.

easter1

Lastly, children can glue and assemble their cross and glue it to the pop-up hill.  Add a scripture verse about Easter, and/or the words “Jesus died for sin“..

Happy Easter!

Bumblebee of Hearts

Bumblebee of hearts

Here’s a fun project idea for a Valentine’s Day Card exchange … make some cute “Bumblebee of Hearts” cards!

For younger preschoolers, we pre-cut heart shapes from black, yellow and wax paper (black heart should be smaller than yellow heart). If you have older preschoolers, you can have them use heart templates to trace and then cut out the hearts — or fold construction paper in half and draw a half heart shape along the fold.

heart1

Next, have children draw black lines on the yellow heart (like a bumblebee has). Using a glue stick, they can glue the yellow heart onto a piece of construction paper.

heart2

Then have them glue the black heart at the top of the yellow one (for the bee’s head). Glue on googly eyes. Lastly, take the wax paper heart and have them cut it in half and glue them on as the wings! It was a fun project to show them how you can use shapes to make other things.

And it also makes for a cute Valentine’s card … and you can use some cute titles like Will you BEE my Valentine?” or Let’s BEE friends!

Stackable Christmas trees

treesI love, love, LOVE the story “Mr. Willowby’s Christmas Tree”! It’s a great seasonal story about how one BIG Christmas tree became a gift for many people and animals. The rhymthic flow of the story is fun to read, and when I read it to my kids or in class, they love how the top of the tree gets a “snip”!

Mr. Willowby’s Christmas tree Came by special delivery.
Full and fresh and glistening green—
The biggest tree he’d ever seen.

The Story

In the story “Mr. Willowby’s Christmas Tree“, Mr. Willowby’s tree was so tall, it couldn’t stand up straight in his parlor. Mr. Willowby asked his butler to chop off the top of the tree. And through the rest of the story, we follow the treetop as it gets shared. I searched for a fun activity that preschoolers could do to go with this story. I wanted something special that went with the story – and found this stackable tree idea from Bella Dia.

The  Activity

This activity provides children a tangible way to see how you can take ONE part of a tree and break it down into smaller trees. It demonstrates how shapes can be used to build upon each other to make something bigger or smaller – and how shapes can be used to create other shapes. Beforehand, I constructed one stackable tree to use as I read the story. Each time Mr. Willowby’s treetop gets a chop … I took a piece off tree, so the children can see how the one big tree can be broken down into smaller parts. It really got their attention to see me take a piece of my paper tree off each time Mr. Willowby’s treetop got a snip!

Afterwards, the children got to make their own stackable tree. First, I cut 4-6 half circles of various sizes out of green construction paper. Each child got 1 set of the half circles to decorate as they wished with stickers and markers (you should use only flat embellishments, so that the tree will stack properly).

IMG2357.JPG.th

Once the children have decorated their tree, I showed them how the 2-dimensional half circle can be curled/folded to create a 3-dimensional cone shape and taped it to secure. After doing this for each of the half circles – the children had fun stacking and unstacking their own Christmas tree! And it was a great way for them to remember the story!

I’m sharing this post with two great blog hops:

Read.Explore.Learn at JDaniels4’s Mom – visit to see great book choices and activities to go with them!

AND

Visit Debbie Clement’s Happy Birthday Blog Hop (Rainbows Within Reach)! Stop by and wish Debbie a “Happy Birthday” and visit all the fun ideas that are linked up below!!

IMG2374_JPG_main

Oh the many ways to make Christmas trees in preschool

Christmas tree


Oh Christmas tree – so MANY WAYS to make a Christmas tree in preschool! From tissue paper to egg cartons, sticks to straws – there are so many different materials that can be used to make Christmas Tree Art projects. And lots of learning that can take place in the process – creative expression, counting, sequencing, fine motor development … so here’s a round-up of some really creative trees that can be made with infants to kindergarteners!


Easy TriangleTrees

Perfect activity for toddlers and young preschoolers to express their creativity! Give them some pre-cut triangle shapes in various sizes and have them put together a tree on a piece of paper, and then embellish with sequins. The “not so perfect” tree shapes are priceless!

Infant Mistletoes

This is such an adorable Christmas keepsake!

Stackable trees

I have the children make these trees after reading “Mr. Willowby’s Christmas Tree”. They get four different size semi-circles to decorate. After decorating, we turn the half circles in cone shapes and then stack the (good sequencing activity to go from largest to smallest cones to stack).

Egg Carton trees

Older preschoolers and kindergarteners can use recycled egg cartons which they cut, paint and arrange to form a tree.

Christmas Tree of Straws

Children will get some great fine motor practice cutting the straws into all different sizes. They can then work to arrange the straws from longest on the bottom to shortest on the top to form their tree.

Nature tree

I love this tree made out of some items found outdoors! After going on a stick hunt, parents and teachers may need to cut some of the sticks so there are various size pieces. Children can work together to arrange the sticks in order to form a tree. Embellish with pom poms – and a star made out of leaves tops it off!

Shredded paper tree

It’s great when you can use recycled materials in an art project. Here shredded paper is used to decorate this tree shape.

Large paper trees

Children can tear and crinkle the paper to their hearts delight as they work together to fill in the space on the large tree cut-out.

Or try this … cut out large tree shapes out of easel paper along with some assorted shapes, like stars, out of colored construction paper. Have toddlers decorate their tree as they wish by drawing with markers or painting with paint on their trees.

Watercolor trees

Using watercolors is a good fine-motor activity for children. We encourage the “wet-wipe-wiggle” method to watercolor painting to get the deepest colors (wet the brush, wipe the brush on a paper towel, wiggle the brush into the paint). Teachers can silhouette cut out the trees and mount onto construction paper once dry.

Paper plate trees

After painting a paper plate green and allowing it to dry; cut the plate into quarters and then assemble into a tree shape.

I hope you enjoyed this round-up of Christmas tree art!

treecollage

Seasonal shadow boxes

box2 As soon as I saw the nature shadow boxes from Teach Preschool – I just knew we had to do this! The idea of making a shadow box can be adapted to any season (winter, spring, summer, fall or for a certain holiday). Children can collect things from nature, bring in items from home or use collage materials from school. The shadow boxes we made here are Christmas themed.

First, we poured a layer of glue into each shoebox lid — that alone generated many “Oooohs” and “Aaaaahs” from the children! Next, we gave the children an assortment of Christmas themed items (such as small ornaments, candy canes, Christmas confetti, pine branches, etc). Oh yea … I still had some scented pinecones left over from another project, so we used those too! The children chose what items they wanted to put into their boxes.

Next, was the best part! The children were given green and red watered-down tempera paint in cups and they then dipped the paint into the glue. The children loved seeing the color spread as it went into the glue. This kept them busy for quite awhile! Some children chose to paint onto some of the items they put into the shoebox lid.

box1

Lastly, they sprinkled red and green glitter into their shadow box, for a sparkly effect! These take a good 3-4 days to dry fully (depending on how much glue you use). As the glue dries it turns clear (and you may not see much of the paint color) – but the process of painting into the glue was great for the children as they explored how the paint reacted with the glue.

Afterwards, you can use these as I-SPY boxes. (ie. “I-SPY something red”, “I-SPY a candy cane”, etc.).

What other types of shadow boxes could you make? What materials would you use?

Playing with nature on a sticky table

nature on a sticky tableI was very inspired to try making a “sticky table” after seeing the Pumpkin vines on the sticky table activity created by Deborah Stewart on the Teach Preschool site. I thought this would work very well with various items in nature that we have outside during this time of year.

To set this up, I cut a large sheet of clear contact paper and used clear packing tape to adhere the contact paper (sticky side up) to the table so it wouldn’t move around. To have some variety of items, I brought in a collection of leaves, pine branches and small pinecones from home. The children also gathered other leaves and sticks from the playground outside. Depending on the season, you can select other items like flowers, clovers and blossoms.

Then we had the children explore their treasures on the sticky table. They played around and noticed that some things didn’t “stick” so well (like larger sticks). But it’s great for them to explore that. They loved the small pinecones I had found from home — and they had to learn to press down on those to make them stick. Most of the children just liked “sticking” the items to the contact paper. Others tried to fill up all the open space. And some children tried to make shapes of other things out the materials – one girl arranged some small red leaves like flower petals. I heard another say “Look, mine looks like a dragonfly!”. And still others liked walking their fingers across the paper and feeling how they stick!DSC08900.JPG.th

The contact paper allowed for children to explore the items and be able to move them around (it’s sticky – but items are repositionable). After they were done playing, we folded over the contact paper and sealed it. This makes for a good display to be hung in the classroom or put into the science center, where children can touch it and feel the impression of the items underneath.

I think in the Spring I’ll bring the contact paper OUTSIDE and attach it to a picnic table and make a nature collage there!

What other kinds of things can you do with a sticky table?

Learning about apples and pumpkins in preschool

apples and pumpkinsFall in New England is a wonderful time to teach preschoolers many things about the season. The change in the weather (and the leaves), along with the harvest of apples and pumpkins are fun to learn about.

If you are fortunate enough to have local farms in your area, a field trip is a great way for young children to experience some of the agriculture of your area first-hand.

By taking preschoolers to visit a local farm, they can learn so much. It is a great opportunity to teach them about living things (animals), life cycles (egg to chick / seed to fruit), where food comes from and local geography.

You can also extend preschoolers learning of farms, apples and pumpkins with some of these activities!

Science

DSC03405.JPG.thMake your own apple cider – Bring in a juicer and take some fresh apples from your field trip and turn them into cider.  Children can observe and experiment with how things turn from one form to another (ie. solid to a liquid).

Seasonal sink or float – Experimenting with Fall objects (such as leaves, acorns,  pumpkins and apples) to see which will sink and which will float.

Apple science– Observe changes to apples when they are cut and exposed to the air.

pumpkin.jpg.th

Open it up! – The best hands-on fun and learning happens when you dig in and open it up!  Cut into an apple, dig into a pumpkin and let children touch, see and smell.

Art

And you can even use the parts of apples or pumpkins in children’s art … adding another sensory experience to the process of their art!

Apple stamping art – Slice apples in half and place them into paint.  Then stamp it onto the paper.

Paper Plate Pumpkins – Using paper plates, orange paint mixed with some white glue and dried pumpkin seeds children can make their own pumpkin.  Really fun after you have opened up a real pumpkin and explored the inside!

DSC09046

What is your favorite apple or pumpkin activity?  Please share with us in the  comments!